WAS Auto WAS Auto

How to Install a Brake Backing Plate?

Time:2026-09-28 Author:Charlotte
0%

A brake backing plate is easy to overlook until rust, distortion, or trapped debris becomes visible. Yet it protects nearby brake components and helps keep dust and road grit away from the assembly. It also provides mounting points for related hardware, depending on the vehicle’s design. Small part. Important job.

NHTSA’s 2023 Traffic Safety Facts reported 40,901 U.S. traffic fatalities. That figure does not link fatalities to backing plates, but it reinforces why brake work deserves careful attention. NHTSA’s Federal Motor Vehicle Safety Standard No. 135 also sets braking-performance requirements for light vehicles. Safe performance depends on the complete system, not one replacement part alone.

This guide explains how to install a brake backing plate with practical checks for fitment, removal, installation, and reassembly. Expect rusted fasteners, sharp edges, and a plate that may not seat cleanly at first. A small admission: this repair can feel fiddly, especially when old hardware resists. Do not force a mismatched plate into place. Verify the part against the vehicle’s year, make, model, and brake configuration. Follow the manufacturer’s service manual for torque values and any vehicle-specific steps. Those details vary. If the hub, brake lines, or other safety-critical parts are damaged, stop and get qualified help. The aim is a clean, correctly seated installation—not a quick shortcut.
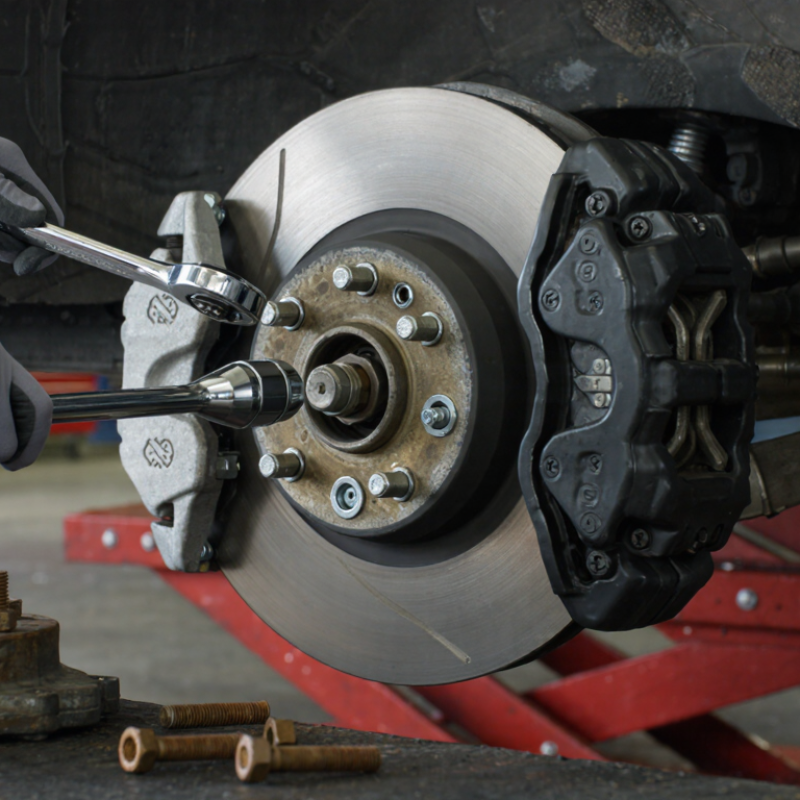
How to Install a Brake Backing Plate?

Confirm the vehicle-specific backing-plate design and OEM fastener torque specifications

Before removing a brake backing plate, confirm the exact design for the vehicle, model year, and axle. Compare the replacement with the installed plate: check its outline, mounting holes, access slots, and clearance around the rotor, hub, ABS wiring, and parking-brake hardware. A plate that looks close may still block a cable or rub against a rotating part.

Small details matter. Photograph the assembly before disassembly, and note fastener locations. I still double-check this step; assumptions are easy to make when rust hides the original shape.

Use the vehicle manufacturer’s service information for the correct fastener sequence and torque values. There is no universal backing-plate torque. Specifications can differ by fastener, axle, and design, so avoid copying a value from another vehicle or relying on an impact tool for final tightening. Clean threads only as directed, seat the plate evenly, and use a calibrated torque wrench.

NHTSA’s Traffic Safety Facts: 2022 Data reported 42,514 U.S. traffic deaths that year. That figure is not specific to brake repairs, but it underscores why careful, verifiable work matters.

If the specified procedure is unclear, pause and confirm it before reassembly.

Chock the wheels and support the vehicle on properly rated jack stands

How to Install a Brake Backing Plate?

Before removing a wheel, park on firm, level ground and keep people clear of the work area. Select wheel chocks that cannot easily crush or slide. Chock the wheels remaining on the ground, snug against the tires. Put an automatic transmission in Park, or a manual transmission in gear. For rear brake work, check whether the parking brake must be released; never let that remove your only protection against movement. A slight slope can matter.

Use a floor jack only to raise the vehicle, then support it with jack stands rated for its weight. Place the stands at the vehicle maker’s specified support points, not under thin floor panels or suspension parts chosen by guesswork. Lower the vehicle slowly until its weight rests securely on both stands. Check that each stand sits upright on solid ground, then give the body a gentle stability check from the side. It should not rock or shift. If anything moves, stop and reset the support. Do not work beneath a vehicle held only by a jack. I’ve seen small setup shortcuts consume more time than the repair itself, and they are not worth repeating. Once the vehicle is stable, you can proceed with wheel and brake removal.

Remove the brake caliper, rotor, and hub as required by the vehicle design

How to Install a Brake Backing Plate?

Before reaching the backing plate, identify how your vehicle’s brake assembly comes apart. Procedures vary: some designs let the rotor slide off after caliper removal, while others require hub or bearing removal. Check the service information for your exact model; guessing can damage parts or create extra work. Park on level ground, secure the vehicle, and support it with correctly rated stands. Never rely on a jack alone.

Remove the caliper fasteners and hang the caliper securely from the suspension with a proper support. Do not let it hang by the brake hose. Take off the rotor’s retaining fastener, if fitted, then remove the rotor. Rust may hold it in place. Use only the removal method specified for the vehicle, and avoid striking nearby sensors or the hub. If the backing plate is trapped behind the hub, follow the prescribed hub-removal steps. Keep track of fasteners and note their locations. It is easy to overlook one.

Tips: Wear eye protection and use the correct tools. Compare the new plate with the old one before fitting it. Check the service procedure for torque values and any required replacement fasteners. If a hub feels seized or the steps are unclear, pause and get qualified help. A little patience beats forcing it.

Install the plate in the correct orientation and preserve OEM clearances

Before fitting a brake backing plate, compare its bends, openings, and mounting tabs with the removed plate. The shape is not always symmetrical. Match the plate’s offset and orientation to the hub and steering knuckle, using the vehicle’s service information when the position is unclear. A plate installed backward can rub against the rotor or interfere with nearby parts.

Clean the mounting face and check for rust or trapped debris. Even a thin flake can tilt the plate. Seat it flat, then tighten the fasteners to the specified torque. Do not pull a misaligned plate into place with the bolts; that can distort the metal. Check the clearance around the rotor by turning it slowly by hand. Listen for scraping. A faint, steady touch may indicate contact, not a harmless quirk.

Inspect the gap near the caliper, wheel-speed sensor wiring, and suspension components through a full steering turn where applicable. Keep wires and hoses in their original routing. Small gaps matter. If the plate shifts or clearance looks uneven, stop and correct the fit before reassembly. I have seen a tiny bend cause persistent noise; it is easy to miss during a quick check. Recheck fastener torque and confirm the rotor turns freely before lowering the vehicle.

Torque fasteners to OEM values, then verify brake and ABS operation before driving

A backing plate may look simple, but its fasteners help keep brake components aligned under load. Clean the mounting surfaces and inspect threads before assembly. Tighten each fastener in the specified sequence with a calibrated torque wrench, using the exact OEM value for that vehicle. Do not substitute a generic torque figure; plate design, bolt size, and material can differ. Recheck the fasteners after the first pass. Small details matter.

A correct torque setting does not prove the repair is safe. Before moving the vehicle, confirm the brake pedal feels firm and the ABS warning lamp completes its normal self-check. NHTSA’s 1996 evaluation of four-wheel ABS estimated an 18% reduction in passenger-car fatal-crash involvement in multi-vehicle crashes. That finding underlines why the system’s condition matters, though it cannot verify an individual repair. If the warning lamp stays on, a scan tool can help identify stored ABS faults. Do not drive until the cause is addressed.

Then make a cautious, low-speed check in a clear, controlled area. Listen for scraping, watch for pulling, and apply the brakes gently. It is easy to rush this step. If pedal feel changes, a warning appears, or a wheel binds, stop and reinspect the installation before road use.

FAQS

How should I secure the vehicle before removing a wheel?

Park on firm, level ground. Chock the grounded wheels snugly. Raise the vehicle with a floor jack, then support it on rated stands at specified points. Never work beneath a jack alone.

How can I identify the backing plate’s correct direction?

Compare its bends, openings, and tabs with the removed plate. Use service information if the offset is unclear. The shape may not be symmetrical.

What should I check before bolting the plate in place?

Clean the mounting face and remove rust flakes or debris. Seat the plate flat. Don’t use bolts to force a poor fit.

How do I check clearance after installation?

Turn the rotor slowly by hand and listen for scraping. Check gaps near the caliper, sensor wiring, and suspension. Small gaps matter.

What torque should I use?

Use the exact torque value and sequence specified for that vehicle. Tighten with a calibrated torque wrench. Generic numbers can be wrong.

Is correct torque enough to confirm a safe repair?

No. Check that the rotor turns freely, the brake pedal feels firm, and the ABS warning lamp completes its normal self-check. If the lamp stays on, diagnose the fault before driving.

What should I do if the plate rubs or clearance looks uneven?

Stop and correct the fit before reassembly. A slight bend or trapped flake can cause contact. I’ve overlooked small details before; a second look helps.

How should I test the repair before road use?

Start with a cautious, low-speed check in a clear area. Brake gently and listen for scraping or pulling. Stop if the pedal changes, a warning appears, or a wheel binds.

Conclusion

Learning how to install a brake backing plate begins with checking that the replacement plate matches the vehicle and confirming the correct fastener torque specifications. Park on a level surface, chock the wheels, and support the vehicle securely on properly rated jack stands before working. Follow the vehicle’s service procedure to remove the caliper, rotor, and hub as needed, keeping track of components and hardware.

Fit the backing plate in the correct orientation, making sure it sits properly and maintains the required clearances around brake and ABS components. Reinstall the removed parts and tighten fasteners to the specified torque values. Before driving, check that the brake components move freely, confirm the ABS wiring and sensors are correctly positioned, and test the brakes carefully at low speed in a safe area. If anything seems incorrect, do not drive until the installation has been inspected.

Charlotte

Charlotte

Charlotte is a seasoned marketing professional with a deep understanding of the company's portfolio and a passion for elevating its presence in the market. With a keen eye for detail and a commitment to excellence, she ensures that our professional blog is regularly updated with insightful articles......