WAS Auto
A stuck brake caliper can turn a routine drive into a serious safety concern. The wheel may feel unusually hot, the vehicle may pull sideways, or the brake pad may wear unevenly. Sometimes, you will hear a sharp scraping sound after releasing the pedal. These signs deserve attention.
The Federal Motor Carrier Safety Administration’s North American Standard Out-of-Service Criteria identifies defective braking components as safety-critical inspection concerns. Its inspection guidance shows why caliper faults should not be treated as minor maintenance issues. NHTSA also advises drivers to investigate changes in braking performance promptly, rather than waiting for a complete failure. These sources do not focus only on seized calipers, but they support the same practical lesson: braking symptoms require careful diagnosis.
This guide explains how to free a stuck brake caliper using seven practical tips. It covers corrosion, seized slide pins, contaminated hardware, piston movement, and safe cleaning methods. A simple inspection may reveal rust around the bracket or a pad that cannot move freely. However, freeing the caliper is not always the correct repair. A damaged piston, leaking seal, cracked hose, or overheated rotor may require replacement by a qualified technician. I have seen drivers mistake temporary movement for a lasting repair. That assumption can be dangerous. Work only on a cool vehicle, support it securely, and follow the manufacturer’s service information. Brake systems vary, and confidence is not a substitute for measurement, inspection, or proper torque.
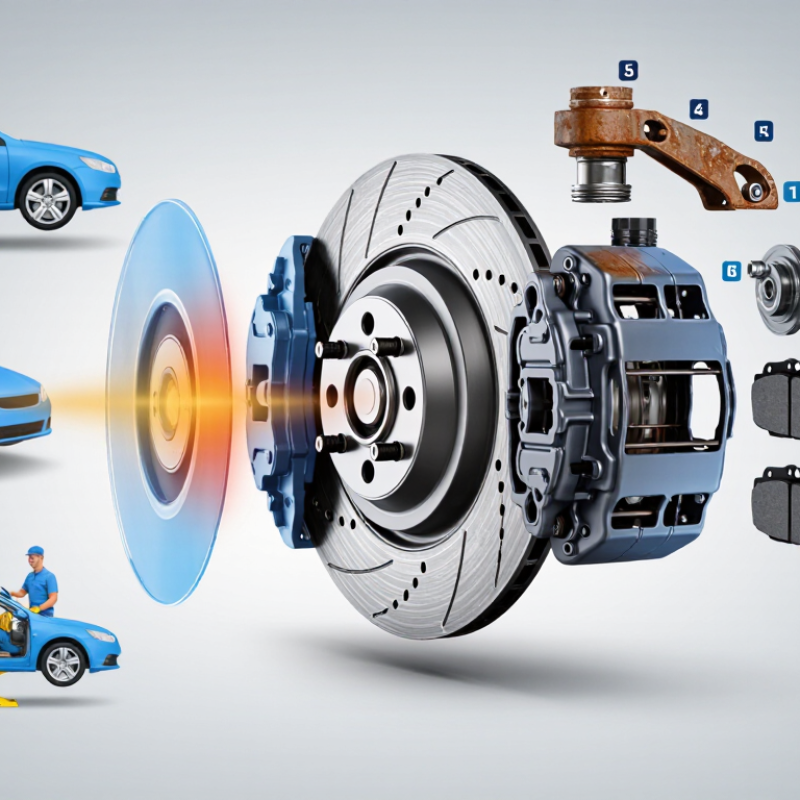
A stuck brake caliper often reveals itself through uneven braking. The vehicle may pull toward one side, especially during gentle stops. You might also smell hot metal or notice smoke near one wheel. After a short drive, park safely and compare wheel temperatures without touching the rotor. One wheel feeling much hotter is a strong warning sign. A dragging caliper can also cause poor fuel economy, rapid pad wear, or a vibrating steering wheel. These symptoms can have other causes, so avoid relying on one clue.
Tips: Listen for scraping after releasing the brake. Check whether the wheel turns freely when safely lifted and supported. Inspect the pad thickness on both sides of the rotor. Uneven wear often points toward a sticking piston or slide pin. Press the brake pedal, then release it. If the wheel remains difficult to rotate, the caliper may not be releasing correctly.
Tips: Do not confuse a seized caliper with a blocked brake hose. A qualified technician can open the bleeder briefly and observe whether pressure releases. If the wheel frees afterward, trapped hydraulic pressure may be involved. If it stays tight, the caliper or mechanical hardware deserves closer inspection. This test is not perfect, and an overheated rotor can distort the results. A careful diagnosis matters more than replacing parts too quickly.
Tips: Check for damaged dust boots, rust, and dry slide pins. Never drive far with a visibly dragging brake. The heat can damage seals, pads, and the rotor.
Before attempting to free a stuck brake caliper, prepare the work area carefully. Park on a flat, firm surface away from traffic. Turn off the engine and remove the key. Wear safety glasses, mechanic’s gloves, and sturdy footwear. Brake dust can irritate your eyes and skin, so avoid blowing it away with compressed air.
Loosen the wheel nuts slightly while the vehicle remains on the ground. Chock the wheels that will stay on the ground. Use a floor jack at the approved lifting point, then support the vehicle with properly rated jack stands. Never work beneath a vehicle held only by a jack. Give the body a firm push before removing the wheel. If it shifts, stop and reset the supports.
Keep the removed wheel nearby as an extra precaution, but never treat it as a replacement for jack stands. Place tools within reach, including a suitable socket set, a brake hose clamp designed for that purpose, and a small tray for hardware. Do not pull hard on the brake hose or let the caliper hang from it. If the caliper is fitted to a rear parking-brake system, confirm how that mechanism releases before applying force. One overlooked detail can damage the assembly. A careful pause here is not wasted time.
Free the Seized Caliper with Safe Step-by-Step Methods
A stuck brake caliper can leave one wheel hot, noisy, or difficult to rotate. Begin on level ground. Engage the parking brake, chock the opposite wheels, and support the vehicle with rated stands. Never trust a jack alone. Remove the wheel and compare the brake pads. Uneven wear often points toward seized slide pins or a trapped piston.
Tips: Spray penetrating fluid around the slide pins, not onto the friction surfaces. Remove the caliper carefully, then support it with wire. Do not let it hang from the flexible brake hose. Clean rust from the bracket with a suitable brush. The caliper should move smoothly on its pins. If the piston needs retracting, use an old pad and a C-clamp slowly. Stop if the piston resists sharply.
A shortcut I once regretted was forcing a rusty piston with excessive pressure. It damaged the seal and created a fluid leak. Patience matters here. Inspect the dust boot, piston surface, hose, pads, and rotor for heat damage. Never heat the caliper near seals or brake fluid. If the piston remains locked, the caliper usually needs professional rebuilding or replacement. After reassembly, pump the pedal until firm, check the fluid level, and test braking at walking speed in a safe area. Do not drive if the pedal feels soft, the wheel stays hot, or fluid appears.
| Tip | Method | Best Use | Safe Step-by-Step Procedure | Important Safety Check | Stop and Seek Professional Service If... |
|---|---|---|---|---|---|
| 1 | Confirm the source of the drag | A wheel remains difficult to rotate, the vehicle pulls to one side, or one brake becomes unusually hot. | Park on a level surface, secure the vehicle, and compare wheel temperatures only after allowing the brakes to cool. Raise and support the vehicle with approved stands, then check whether the wheel rotates freely. Inspect the rotor, pads, caliper, brake hose, and parking-brake mechanism. | Never work under a vehicle supported only by a jack. Do not touch a recently heated brake rotor or caliper. | The wheel, rotor, or hub has severe damage, or the source of the resistance cannot be identified. |
| 2 | Release external tension | The brake remains applied because of a parking-brake cable, lever, or other external linkage. | Verify that the parking brake is fully released. Inspect the cable and caliper lever for corrosion, kinks, or incomplete return. Move the lever only as specified by the vehicle service information; do not force it against its stop. | Keep hands clear of pinch points. Do not disconnect hydraulic lines while attempting this inspection. | The cable is frayed, seized inside its housing, or the lever does not return correctly after the external cause is addressed. |
| 3 | Clean exposed sliding surfaces | Floating-caliper guide pins or pad contact points are restricted by rust, dirt, or dried lubricant. | Remove the wheel and, if required by the service procedure, remove the caliper. Clean guide-pin bores, pins, pad abutments, and hardware with an appropriate brake cleaner and a suitable brush. Remove loose corrosion without damaging sealing boots. | Use eye protection and avoid breathing brake dust. Do not use compressed air to blow brake dust into the air. | A guide pin is bent, pitted, broken, or cannot be removed without damaging the caliper. |
| 4 | Lubricate guide pins and pad contact areas correctly | The caliper slides poorly after cleaning, but the guide pins and boots are serviceable. | Apply only a thin layer of brake-system lubricant that is compatible with rubber boots and high brake temperatures. Lubricate the guide-pin sliding surfaces and the pad contact points specified by the service procedure. Refit the boots securely and remove excess lubricant. | Keep all lubricant off the friction surfaces of pads and rotors. Do not use petroleum grease where it may swell rubber components. | The rubber boot is torn, the pin is deeply corroded, or the caliper still binds after correct lubrication. |
| 5 | Retract the piston using the correct tool | The piston is extended and prevents pad clearance during pad replacement or caliper service. | Check whether the piston must be pressed straight in or rotated while retracting. Open the brake-fluid reservoir cap only if appropriate for the vehicle procedure, protect painted surfaces, and use the correct piston tool. Retract the piston slowly and evenly. | Never force a wind-back piston straight in when its design requires rotation. Monitor the brake-fluid level and prevent fluid from overflowing. | The piston will not move, the dust boot twists or tears, fluid leaks, or the piston surface is corroded. |
| 6 | Inspect the hydraulic hose and bleed only when required | The caliper releases slowly or remains applied even when the pedal is released. | Inspect the flexible hose for swelling, cracking, kinks, or external damage. A restricted hose can trap hydraulic pressure, so diagnosis should follow the vehicle service procedure. If the hydraulic system is opened, use the specified fluid, keep the reservoir clean, and bleed the system fully afterward. | Brake fluid damages paint and can irritate skin. Use fresh fluid from a sealed container and dispose of waste fluid properly. | The hose is damaged, the bleeder screw is seized or broken, air remains in the system, or the pedal feels soft after bleeding. |
| 7 | Replace damaged parts and verify the repair | The caliper, piston, seals, guide pins, pads, rotor, or hose is worn, corroded, or contaminated. | Replace or rebuild components only with parts and procedures suitable for the vehicle. Reassemble with the correct torque values, install pads and hardware correctly, pump the brake pedal until firm, check fluid level, and confirm there are no leaks. Perform a slow controlled road test in a safe area. | A seized caliper can overheat pads and rotors. Replace friction components that are cracked, excessively worn, or contaminated with brake fluid or grease. | The vehicle pulls, the brake remains hot, the pedal is soft, warning lamps stay on, or braking performance is uneven. |
| Safety note: Allow the brake assembly to cool completely before service, support the vehicle securely, and follow the vehicle manufacturer's repair specifications. After any hydraulic brake work, do not drive until the pedal is firm and the system has been checked for leaks and proper operation. | |||||
A stuck brake caliper can create constant friction, heat, and uneven pad wear. Inspect the entire brake assembly before forcing anything loose. Remove the wheel and check the pads, rotor, piston, guide pins, dust boots, and flexible hose. Blue rotor marks or a burning smell suggest serious overheating. Uneven pad thickness often points to seized guide pins or piston movement. Do not blame the caliper too quickly.
Tip: Compare both sides of the axle. A healthy side gives useful clues.
Look for torn rubber boots, deep corrosion, leaking fluid, and cracked hoses. A piston that will not retract may have internal rust or a damaged seal. Replace the caliper when its bore, piston, or seal is badly worn. Replace damaged pads, rotors, pins, or hoses instead of reusing questionable parts. A brake hose can collapse internally, restricting fluid return. I have seen clean-looking components hide expensive problems. A rushed inspection misses them.
Tip: Never hammer the piston or force a leaking caliper back into service.
After fitting replacement parts, use the correct torque settings and bleed the brake system if opened. Confirm firm pedal pressure, equal pad contact, and free wheel rotation. Check for leaks around every connection. Perform a gentle low-speed test before normal driving. Recheck the rotor temperature afterward, carefully and without touching it. A small mistake here can become a dangerous one.
A stuck brake caliper can leave one wheel dragging, overheating, or wearing unevenly. Before freeing it, park on level ground, support the vehicle securely, and allow the brakes to cool. Never drive if the wheel smokes, the pedal feels soft, or the car pulls sharply.
Tip: Inspect the caliper piston, slide pins, dust boots, pads, and hose. A seized slide pin may need cleaning and high-temperature brake lubricant. A damaged piston seal or swollen hose usually requires replacement, not force. After repairs, press the pedal until it feels firm. Then test the brakes slowly in a quiet, safe area. The vehicle should stop straight without grinding or pulling.
Check for trouble again. After a short drive, compare wheel temperatures carefully with an infrared thermometer. Do not touch the rotor directly. One wheel much hotter than the others may indicate continued drag. Listen for scraping, notice unusual smells, and watch whether the vehicle rolls freely. I have found that a simple temperature check can reveal problems that a visual inspection misses.
Tip: Prevent future caliper seizure by inspecting slide boots during every brake service. Keep mounting surfaces clean, replace cracked rubber parts, and use the correct lubricant sparingly. Flush old brake fluid at the recommended interval because moisture can promote internal corrosion. Wheel nuts and caliper fasteners must follow the vehicle’s service specification. I would not reuse damaged hardware, even when it appears acceptable.
Brake pad thickness is a practical warning sign when checking for caliper seizure. The values below are common service references; always confirm the exact limits for the vehicle being inspected.
Compare the inner and outer pads on the same wheel. Uneven wear can indicate a seized piston or guide pin. After freeing the caliper, inspect the dust boot, lubricate suitable sliding surfaces with brake-safe lubricant, confirm the wheel rotates freely, and perform a controlled brake test.
One wheel may feel unusually hot, smell odd, or produce scraping sounds. The vehicle might pull sharply or roll poorly. Uneven brake-pad wear is another clue.
Park on level ground and let the brakes cool completely. Engage the parking brake and chock the opposite wheels. Use rated stands, not a jack alone.
Compare the brake-pad thickness on both sides. Check the piston, slide pins, dust boot, hose, rotor, and mounting bracket. Look for rust, cracks, leaks, and heat damage.
Apply penetrating fluid around the slide pins, away from friction surfaces. Remove the caliper carefully and support it with wire. Never let it hang from the flexible hose.
Use an old brake pad and a C-clamp. Apply pressure slowly and evenly. Stop immediately if the piston resists sharply or moves unevenly.
No. Heat can damage seals and affect brake fluid. It may also hide serious internal damage. Patience is safer here.
A locked piston, damaged seal, swollen hose, or fluid leak usually needs replacement or professional rebuilding. Forcing rusty parts can make the problem worse. I learned that the hard way.
Pump the brake pedal until it feels firm. Check the fluid level, then test braking at walking speed in a quiet area. The vehicle should stop straight without grinding or pulling.
After a short drive, compare wheel temperatures with an infrared thermometer. Do not touch the rotor directly. One much hotter wheel suggests continued drag.
Inspect slide-pin boots during brake service and replace cracked rubber parts. Clean mounting surfaces and use the correct lubricant sparingly. Follow the vehicle’s service specifications for fluid changes and fastener tightening.
Learning how to free a stuck brake caliper begins with recognizing warning signs such as uneven braking, a burning smell, unusual wheel heat, dragging, or the vehicle pulling to one side. Park on a level surface, switch off the engine, use protective equipment, chock the wheels, and support the vehicle with properly rated stands. Never work beneath a vehicle supported only by a jack.
To understand how to free a stuck brake caliper, remove the wheel and inspect the caliper, mounting hardware, guide pins, pads, and brake hose. Clean accessible corrosion, lubricate suitable moving parts with brake-safe lubricant, and carefully work the piston back only with the correct tool. Do not force severely seized components. Replace damaged pads, rotors, seals, hoses, or the entire caliper when necessary. After reassembly, bleed the brake system if required, check for leaks, and test braking at low speed in a safe area. Regular inspections, clean hardware, and timely replacement of worn parts can help prevent future seizure.
