WAS Auto
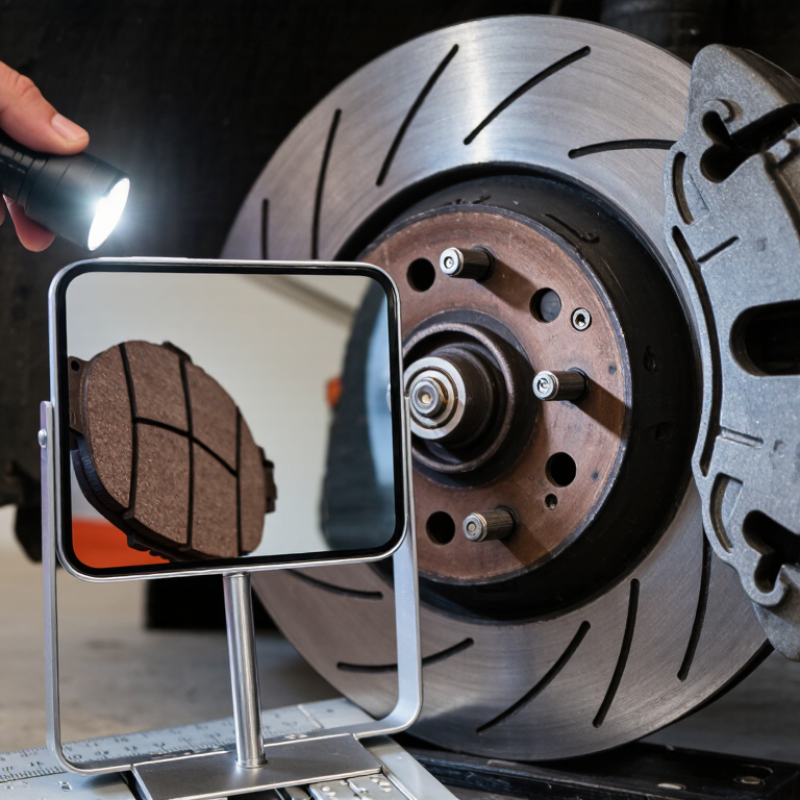
Checking brake pads does not always require removing the wheels. However, a quick visual check is not a complete diagnosis. The goal of this guide is to explain how to check brake pad thickness without removing wheels, using ordinary tools and careful judgment. You will need a bright flashlight, a thin inspection mirror, and a ruler marked in millimeters. Park on level ground, engage the parking brake, and let the brakes cool completely.
Look through the wheel spokes toward the caliper and friction material. The pad usually appears between the rotor and caliper bracket. Compare the friction layer with the metal backing plate. Do not measure the backing plate. Measure only the remaining friction material. John Ibbotson, chief mechanic at Consumer Reports, has emphasized a practical rule: “Brake problems should be inspected before they become emergency repairs.” That warning matters here. A pad can look acceptable from outside while wearing unevenly inside.
Many technicians treat about 3 millimeters as a serious replacement point, but manufacturer limits differ. Check the vehicle service manual. Listen for scraping. Notice vibration, pulling, or a soft pedal. These symptoms need more than a thickness estimate. The inspection mirror can reveal hidden inner-pad wear, although access may still be poor. That is the weak spot. This method is useful, but imperfect. Never rely on one angle, one measurement, or one quiet test drive. If the pad is difficult to see, ask a qualified brake professional to inspect the vehicle safely.
Before checking brake pad thickness through the wheel spokes, park on firm, level ground. Turn off the engine, engage the parking brake, and place the transmission in Park or first gear. Let the brakes cool for at least 30 minutes. Hot rotors can cause severe burns.
Use wheel chocks, safety glasses, gloves, and a strong flashlight. Keep fingers away from the caliper and rotor. Never place any part of your body under a vehicle supported only by a jack. A no-removal inspection should happen with the vehicle resting on the ground. The European Commission’s 2023 roadworthiness data identified braking equipment in roughly one-sixth of major defects. That figure deserves attention.
Look through the wheel openings and compare the friction material on both sides of the rotor. Many professional service guides treat about 3 millimeters as a caution point, not a universal legal limit. Uneven wear matters. A tilted pad, deep rotor grooves, or fresh dark dust can hide the actual thickness. My first visual estimate was too confident. A flashlight angle changed it.
Do not touch the rotor to judge temperature. Do not spray cleaner into the caliper without checking its instructions. If the inner pad is hidden, or thickness appears near the caution point, stop driving unnecessarily and arrange a qualified inspection. A camera can help, but it cannot replace a direct measurement when visibility is poor.
A bright LED flashlight, inspection mirror, and phone camera can reveal much through open wheel spokes. Aim the light behind the caliper, then locate the friction material between the rotor and backing plate. Do not measure the metal backing plate. Measure only the remaining friction block. A typical service warning begins near 3 mm, but vehicle specifications differ. Check the service manual before judging the pad.
A typical service warning begins near 3 mm, but vehicle specifications differ.
The U.S. National Highway Traffic Safety Administration’s FMVSS No. 135 uses a 100 km/h brake-performance test for light vehicles. However, this standard evaluates stopping performance, not a universal pad thickness. That distinction matters. A pad may look acceptable while its inner surface wears faster. Inspect the inner and outer pads, both front wheels, and the visible rotor surface. Use a phone camera with flash when the caliper window is narrow.
A mirror can distort depth. I have mistaken the backing plate for usable friction material before. Compare the pad edges against a millimeter scale placed outside the wheel, without touching moving parts. Uneven thickness, deep rotor grooves, cracks, loose material, or a metal-on-metal appearance requires prompt professional inspection. If spokes or shields block the pad completely, viewing through the wheel is not reliable; wheel removal becomes necessary. The 2024 U.S. Vehicle Maintenance Council inspection guidance also emphasizes documenting pad thickness and uneven wear, not relying on appearance alone.
Step-by-Step Visual Check of Brake Pad Thickness
You can inspect brake pads without removing the wheels. Park on level ground, switch off the engine, and let the brakes cool. Use a bright flashlight through the wheel spokes. Find the brake rotor, then identify the friction material pressed against its outer surface. The backing plate is the darker metal layer behind it. Measure the friction material only, not the backing plate. This check is imperfect.
Many repair facilities recommend planning replacement near 3 millimeters of remaining friction material. At about 1 millimeter, driving should stop until a qualified technician confirms the condition. The U.S. Department of Transportation’s FMVSS No. 135 evaluates passenger-vehicle braking performance but does not set one universal pad-thickness limit. Always compare your vehicle’s service specifications. They may differ.
Check the inner and outer pads separately. The inner pad can wear faster, especially when a caliper does not release correctly. Look for uneven thickness, cracks, loose material, or a shiny surface caused by overheating. A thin edge can be difficult to judge through spokes. Take a close photograph and compare both sides. NHTSA crash-factor research has associated brake-related problems with roughly one-fifth of reported crashes, although maintenance is only one possible cause. If the pad looks uneven, the rotor has deep grooves, or braking feels different, arrange a professional inspection. A visual estimate is useful, not proof.
Checking brake pad thickness without removing the wheel is possible with good lighting and patience. Park on level ground, switch off the engine, and allow the brakes to cool completely. Turn the steering wheel to expose the caliper through the spokes. Shine a flashlight toward the brake pad, then identify the friction material between the metal backing plate and the rotor.
Use a small ruler or digital caliper to estimate the remaining friction material. Measure the pad itself, not the backing plate. New pads commonly contain about 10–12 millimeters of material, while 3 millimeters usually signals replacement time. However, specifications differ, so confirm the vehicle’s service guidance. Check both the inner and outer pads. They may wear unevenly, and the inner pad is often harder to see. A phone camera or inspection mirror can improve the view. This method is useful, but it is not perfect. Limited angles can hide cracks, uneven wear, or a damaged rotor.
Tips: Keep fingers away from moving parts and never inspect hot brakes. Compare pad thickness on both sides of the axle. Look for deep grooves, loose material, rust flakes, or a shiny backing plate. If the measurement seems unclear, have a qualified technician inspect the brakes before driving far. My first estimate was sometimes too generous under poor light, so take two readings from different angles.
Checking brake pad thickness through the wheel is useful, but it is not a complete diagnosis. Park on level ground, let the brakes cool, and use a flashlight through the wheel spokes. Measure the friction material, not the metal backing plate. Many technicians treat 6 mm as a condition to monitor and 3 mm as a practical replacement point. At 2 mm or less, braking performance and heat control may deteriorate quickly. These figures are guidance, not universal legal limits. Always check the vehicle maker’s specification.
NHTSA has reported that brake-related problems appear in about 22% of crashes involving vehicle defects. That figure makes routine inspection more than a cosmetic task. Look for uneven thickness between the inner and outer pads, deep grooves, crumbling edges, or a shiny glazed surface. A wear indicator may scrape before the pad reaches its minimum thickness. However, it can bend, break, or remain silent. I have seen visual checks miss an inner pad worn almost to its backing plate. Wheel removal may still be necessary.
Tips:
Check both sides of the axle, not one wheel only. Record the measurement and date. If the steering wheel shakes, the car pulls, or grinding occurs, arrange a professional inspection promptly. A thickness reading alone cannot confirm rotor condition, caliper movement, or hydraulic problems. That limitation is easy to overlook.
Yes, if the wheel spokes provide a clear view. Use a flashlight, mirror, or phone camera. Blocked views are unreliable.
Park on firm, level ground. Turn off the engine and engage the parking brake. Let the brakes cool for at least 30 minutes.
Wear safety glasses and gloves. Use wheel chocks and a strong flashlight. Keep fingers away from the rotor and caliper.
Measure only the friction material. Do not count the metal backing plate. The friction block sits between the rotor and backing plate.
Around 3 millimeters is commonly treated as a caution point. It is not a universal legal limit. Check the vehicle’s service specifications.
Driving should stop until a qualified technician checks it. Very little material remains. Do not rely on appearance alone.
Yes. The inner pad may wear faster when the caliper does not release properly. Compare both pads and both sides of the vehicle.
Look for uneven thickness, cracks, loose material, deep rotor grooves, or shiny overheated surfaces. A metal-on-metal appearance is especially serious.
No. It can reveal hidden areas and capture close details. Poor angles can mislead you. My first estimate was too confident.
Wheel removal is necessary when spokes, shields, or the caliper block the pad. Direct measurement is more reliable than a narrow visual gap.
This guide explains how to check brake pad thickness without removing wheels while keeping safety the top priority. Park on a level surface, switch off the vehicle, apply the parking brake, and allow the brakes to cool completely. Use a flashlight, inspection mirror, ruler, or thickness gauge to view the pad through the wheel openings. Turn the steering slightly when appropriate, but never place any part of your body near a moving vehicle or rely only on a jack.
The visual inspection should compare the friction material on both sides of the rotor and look for uneven wear, cracks, contamination, or a thin remaining pad. Measure the visible friction material at its narrowest point, without including the metal backing plate. Thickness limits vary by vehicle, but a pad approaching the manufacturer’s minimum specification, showing uneven wear, or measuring only a few millimeters generally requires professional evaluation or replacement. If the pad is difficult to see, the measurement is uncertain, or braking performance changes, have the complete brake system inspected before driving further.
